I denne artikel kigger jeg på hvordan man kan bidrage til OpenStreetMap med brug af en app, i dette tilfælde Go Map!! til iOS, som du henter ved at trykke på dette link til app store Go Map!! til iOS
Der findes også apps til Android, f.eks. Vespucci. OpenStreetMap er et kort alle kan redigere, princippet er det samme som man kender fra Wikipedia.
Brugerflade
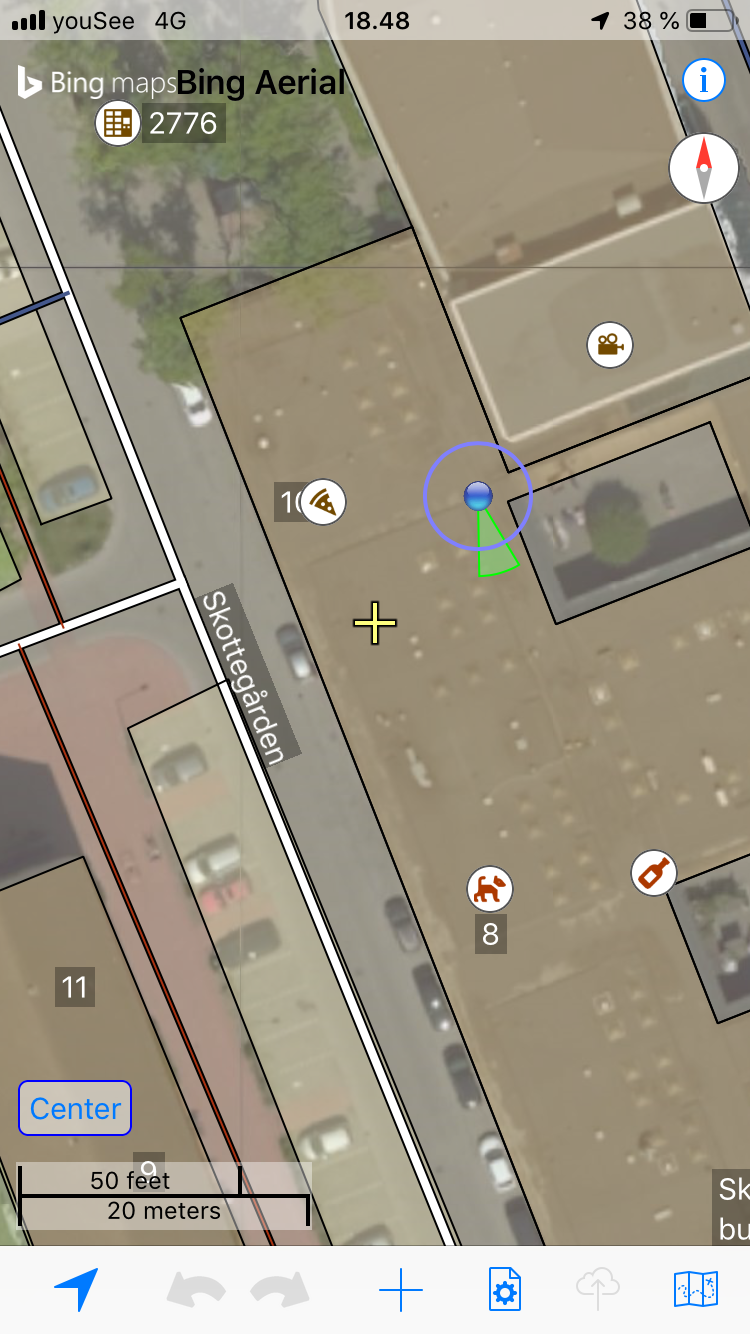
Når man starter Go Map!! appen præsenteres man for en meget enkel brugerflade, der som standard viser et satellitfoto i baggrunden, OpenStreetMap data vises ovenpå, herudover vises din position og din retning.
Log på eller opret konto på OpenStreetMap
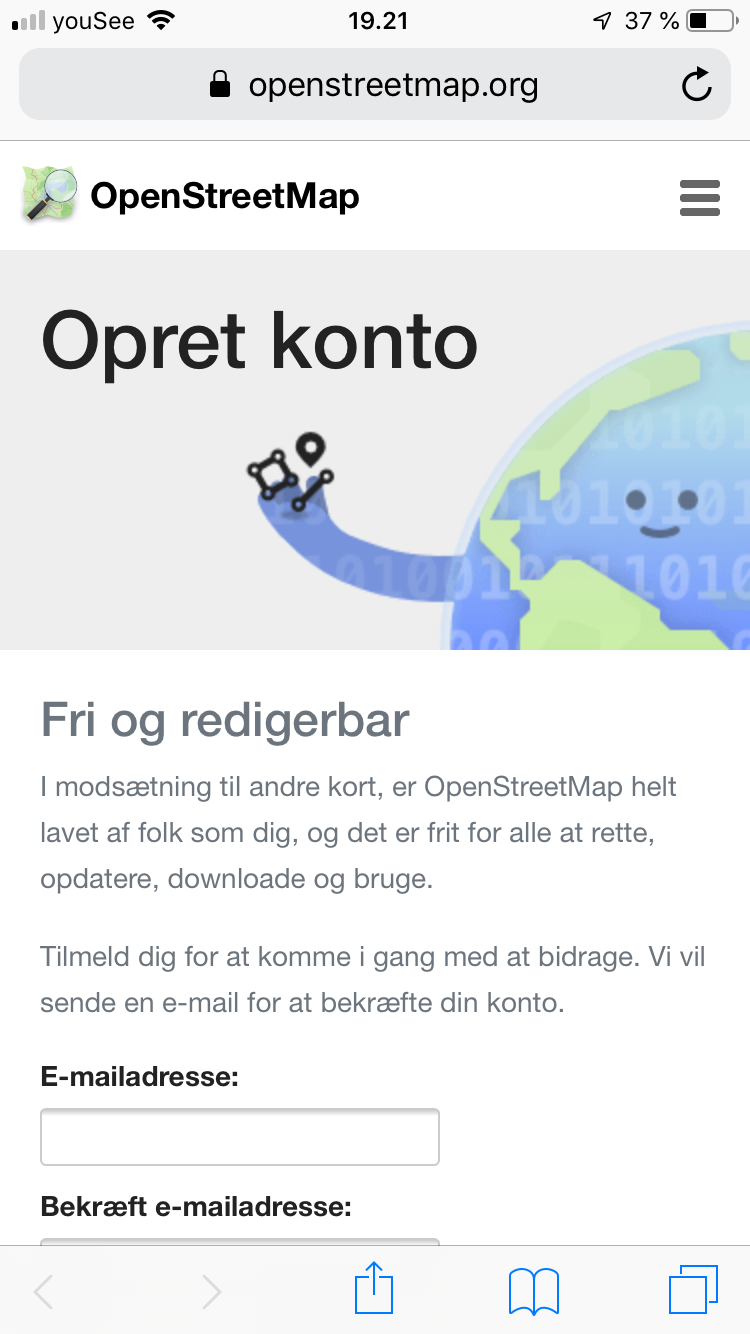
For at kunne opdatere OpenStreetMap skal man først have en konto på OpenStreetMap.
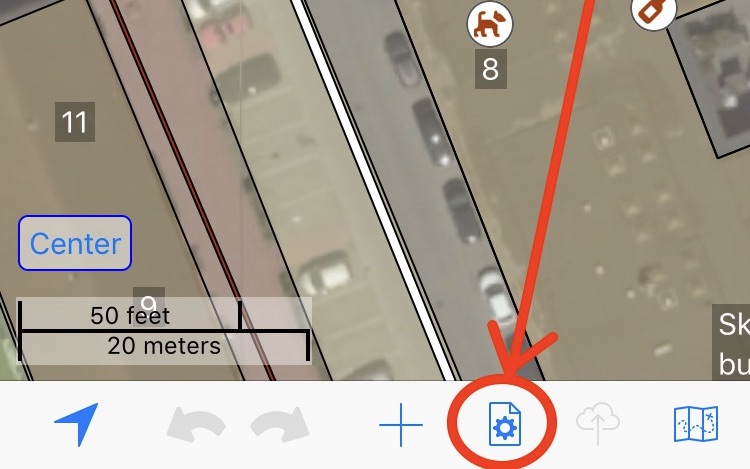
Tryk på Indstillinger-ikonet:
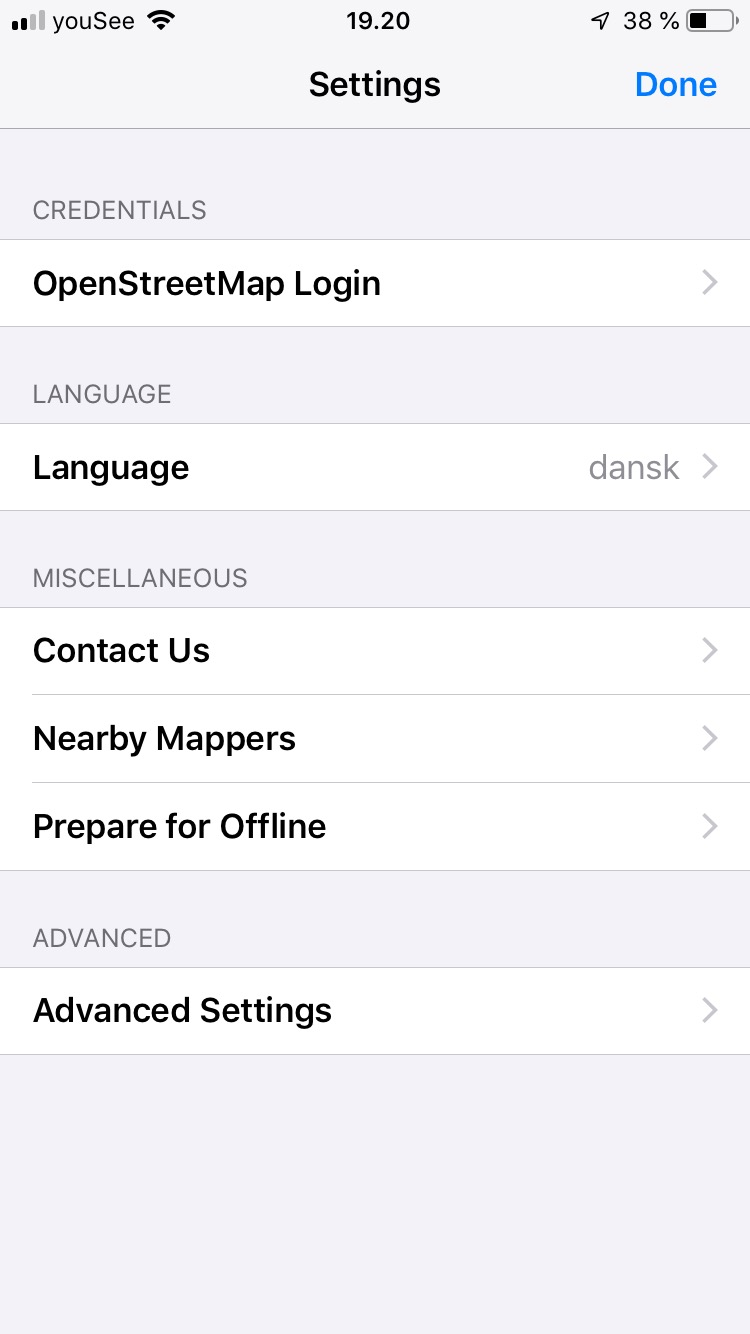
Vælg OpenStreetMap Login
Indtast brugeroplysninger hvis du allerede har en konto
Eller opret en konto ved at trykke på Register New Account
Tryk Save og luk indstillinger, og du er klar til at opdatere OpenStreetMap.
Opret objekter i OpenStreetMap
Jeg ved at der er åbnet en ny butik i mit nabolag, som ikke er oprettet på OpenStreetMap, Audika Hørecenter Kastrup, der bla. forhandler høreapparater, denne vil jeg gerne oprette på OpenStreetMap.
Audika Hørecenter
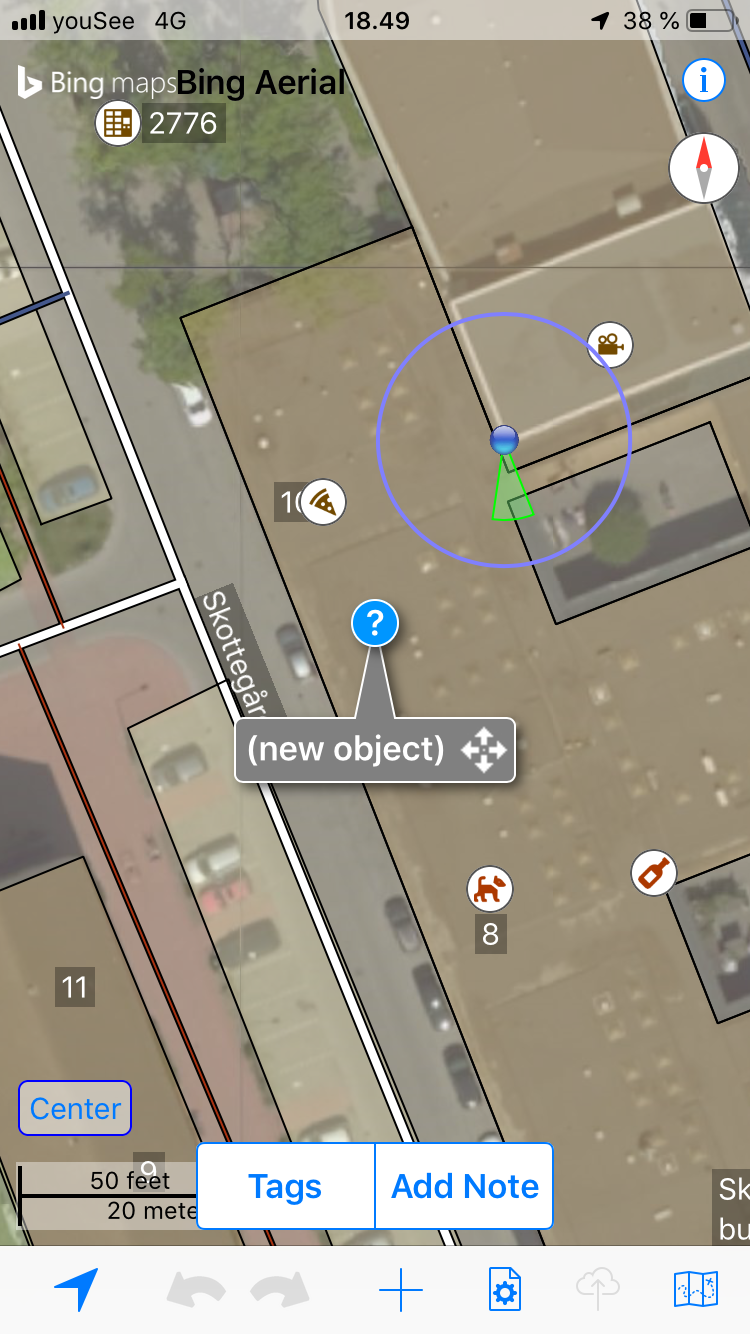
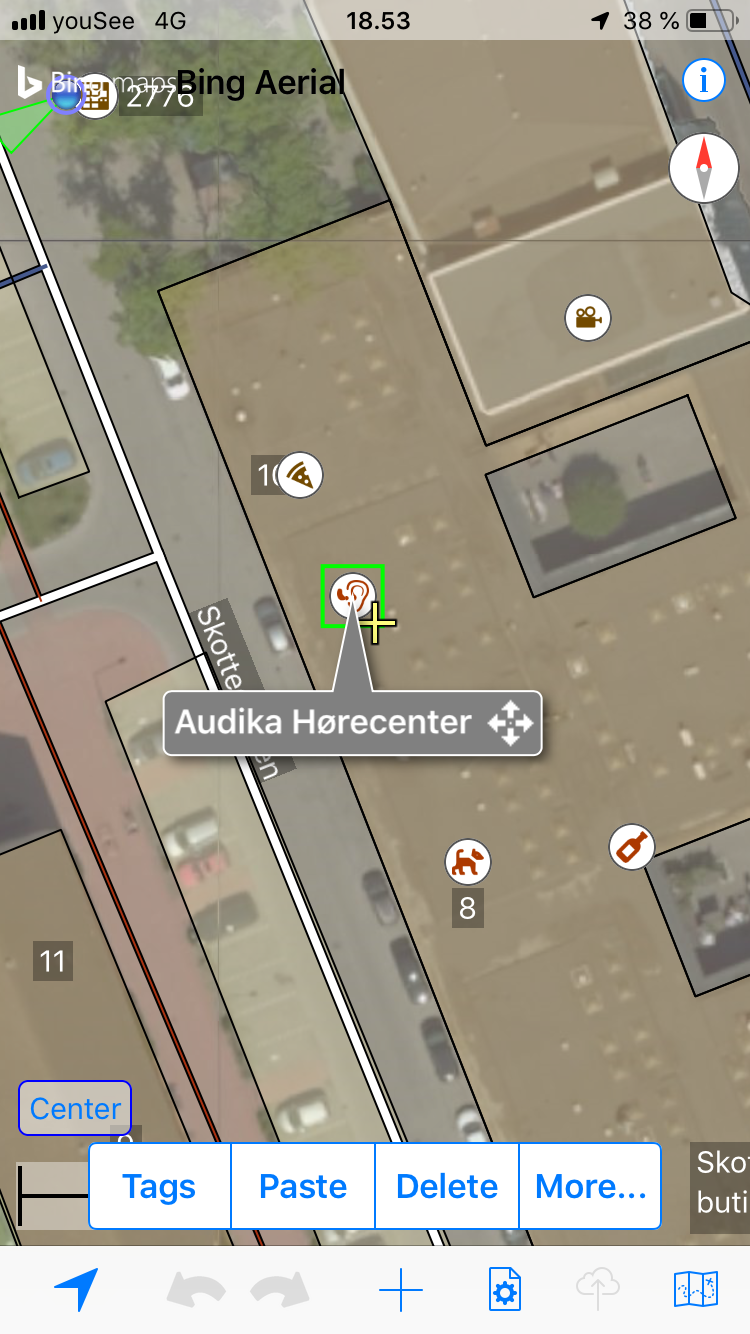
Jeg gik ned og stillede mig foran butikken, og flyttede det gule kryds i midten af skærmbilledet, til butikkens placering.
Herefter trykkede jeg på [+] ikonen
Nu er der blevet tilføjet et nyt objekt, der kan redigeres.
Tryk på Tags for at redigere objektet.
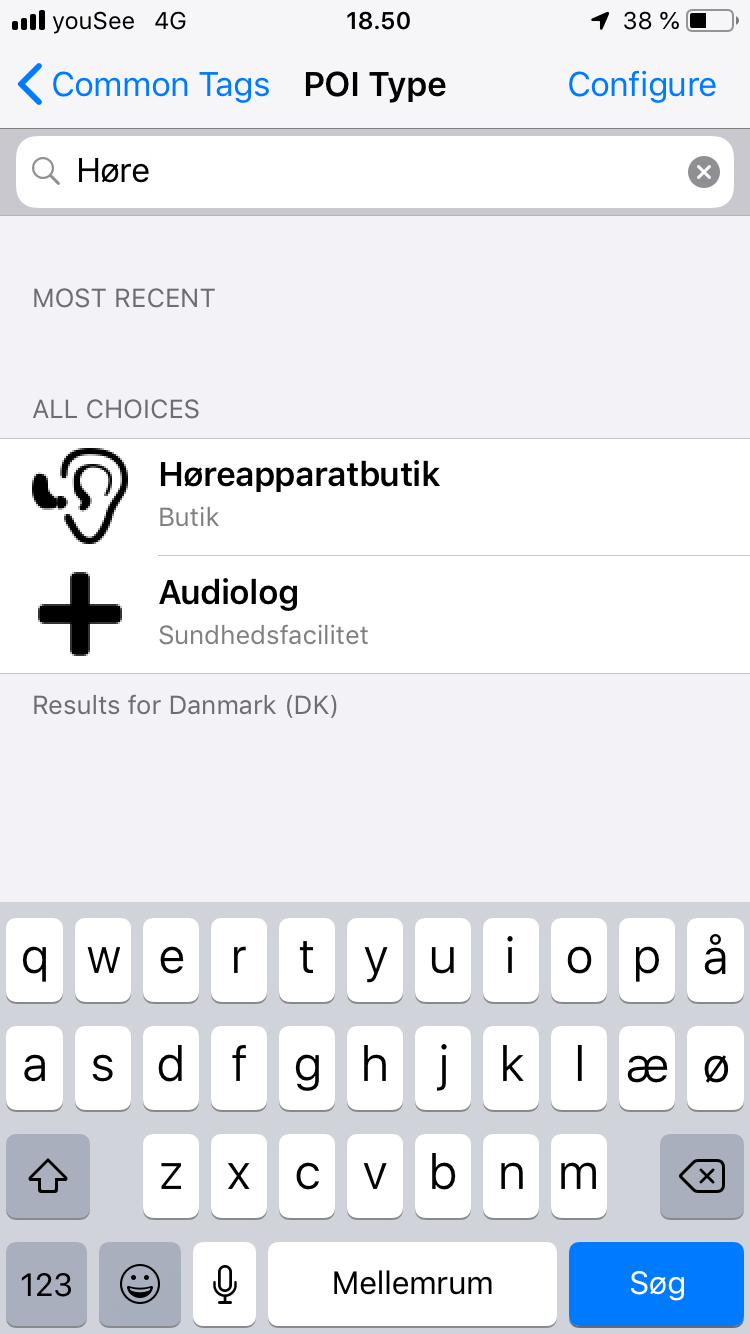
Da der er tale om en høreapparatbutik, søger jeg på “høre”, og muligheden høreapparatbutik dukker op, så den vælger jeg.
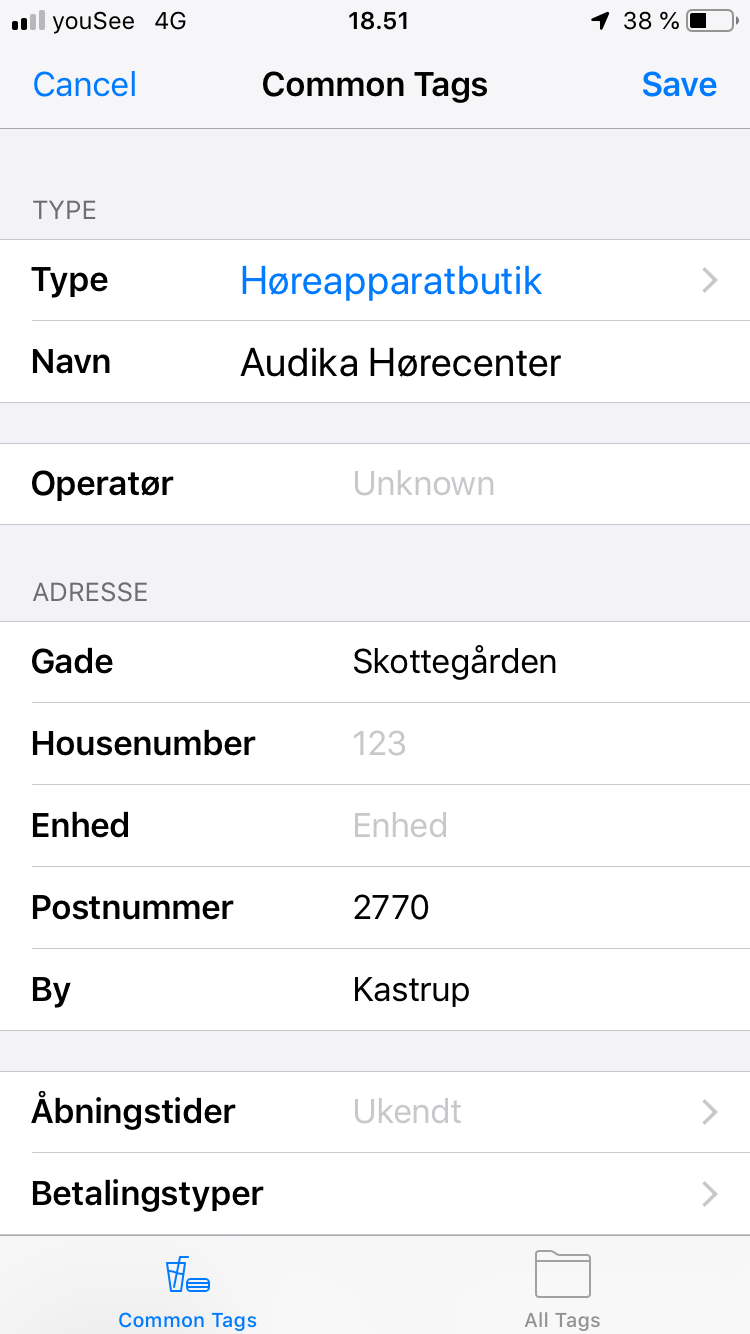
Nu skal der tilføjes detaljer om butikken, herunder navn, adresse, telefonnummer, åbningstider, hjemmeside osv.
Tryk på Save når du er tilfreds, og nu er vi klar til at sende ændringerne til OpenStreetMap
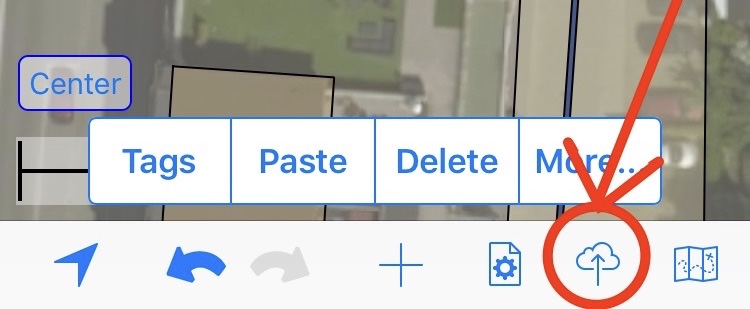
Tryk på Upload-ikonet det ligner en “Sky”, som er markeret med rødt på skærmbilledet, for at sende ændringerne til OpenStreetMap.
Udfyld felterne Changeset comment med en relevant kommentar om redigeringen, og Source med kilden til den nye information, i dette tilfælde skriver jeg Own Survey, da det er noget jeg selv har kortlagt.
Tryk herefter Commit.
Nu er OpenStreetMap opdateret, og ændringerne er tilgængelige for hele verden.
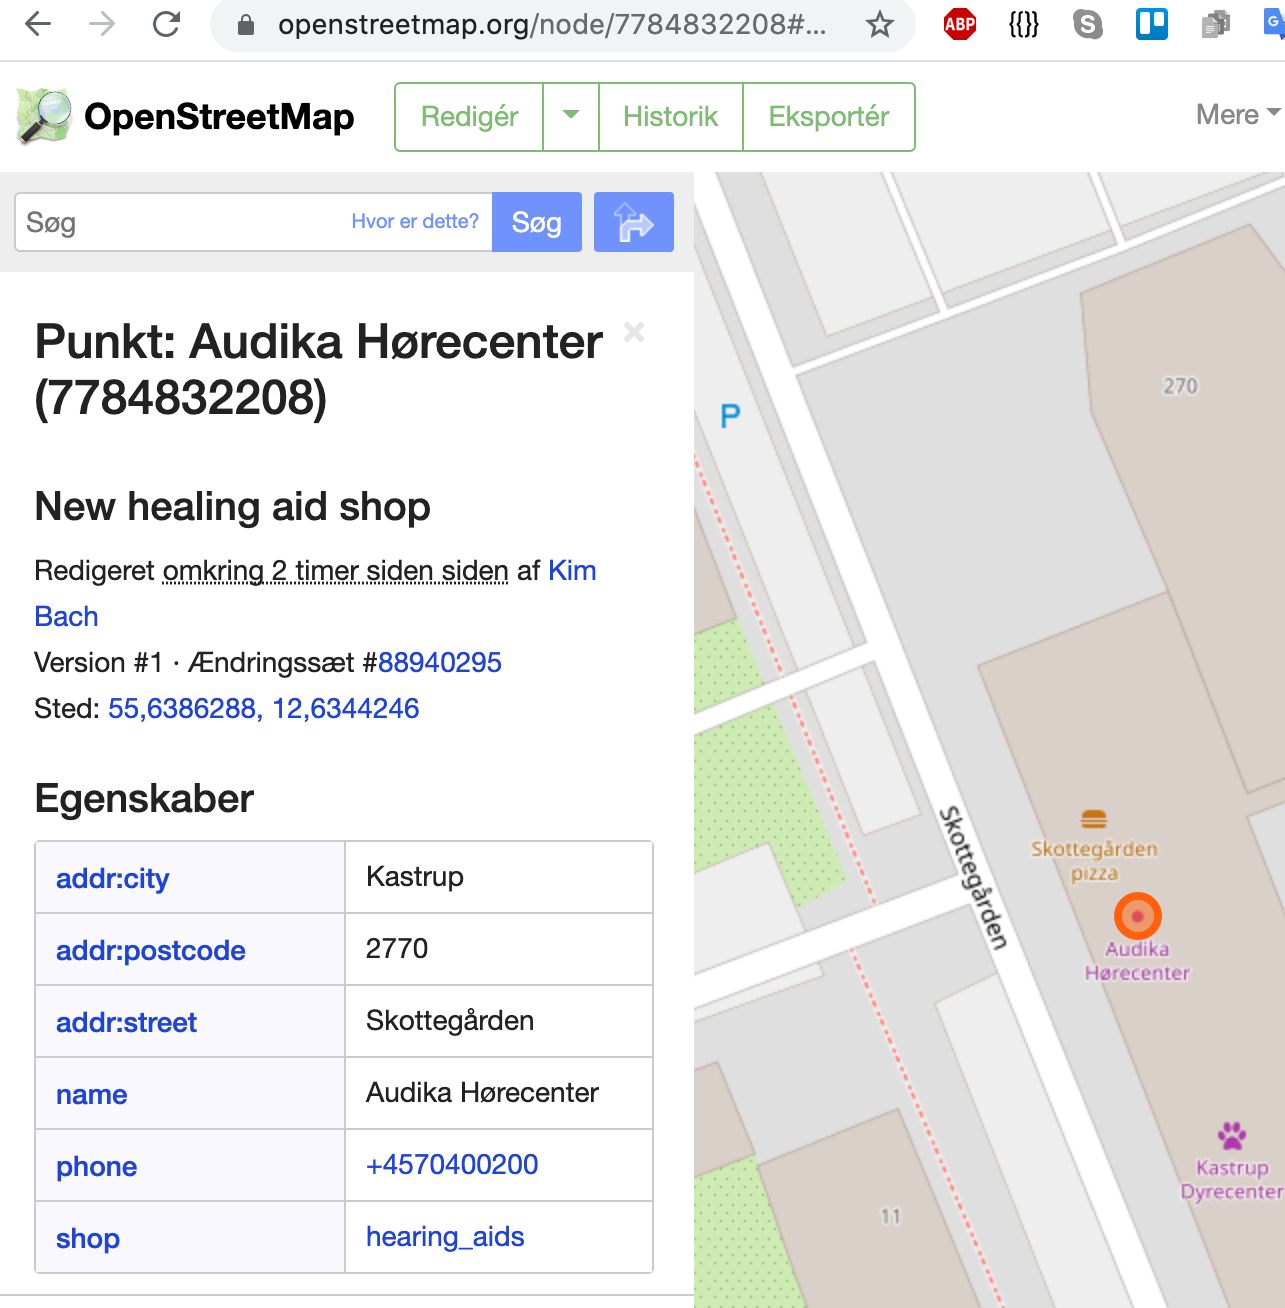
Sådan ser det færdige resultat ud på OpenStreetMap.
OpenStreetMap – Audika Hørecenter
Konklusion
Når du først har oprettet en konto på OpenStreetMap, og har taget Go Map!! i brug, så er det meget let at bidrage til OpenStreetMap når du er på farten.
Man kan f.eks som jeg gjorde i eksemplet, hjælpe med at oprette nye butikker, men stort set alt der har en geografisk placering er relevant for OpenStreetMap.
Begynd f.eks. med at gå rundt i dit lokalområde, og tilføj manglende oplysninger, nye eller lukkede butikker, kunstværker, mindeplader osv.
It can be difficult to contribute to open data projects.
In this, very detailed article, I’ll take you through all the steps involved in adding a commemorative plaque to Wikimedia Commons – an open source of educational materials, like pictures, and OpenStreetMap – an open map that you can edit like Wikipedia.
Notice that you can use different tools, but these are the ones that I often use, and also notice that I’ve been very thorough. You can choose to cut some corners, and wait for others to add the information, that’s the beauty of projects like Wikimedia Commons and OpenStreetMap.
Introduction
I often pass by commemorative plaques that I’ve never noticed before, it makes me very curious about the history behind it, so I quite often take a picture of them and later I share them on Wikimedia Commons and OpenStreetMap.
A lot of the plaques are already documented, but in closed databases, we can do better in the 21st Century.
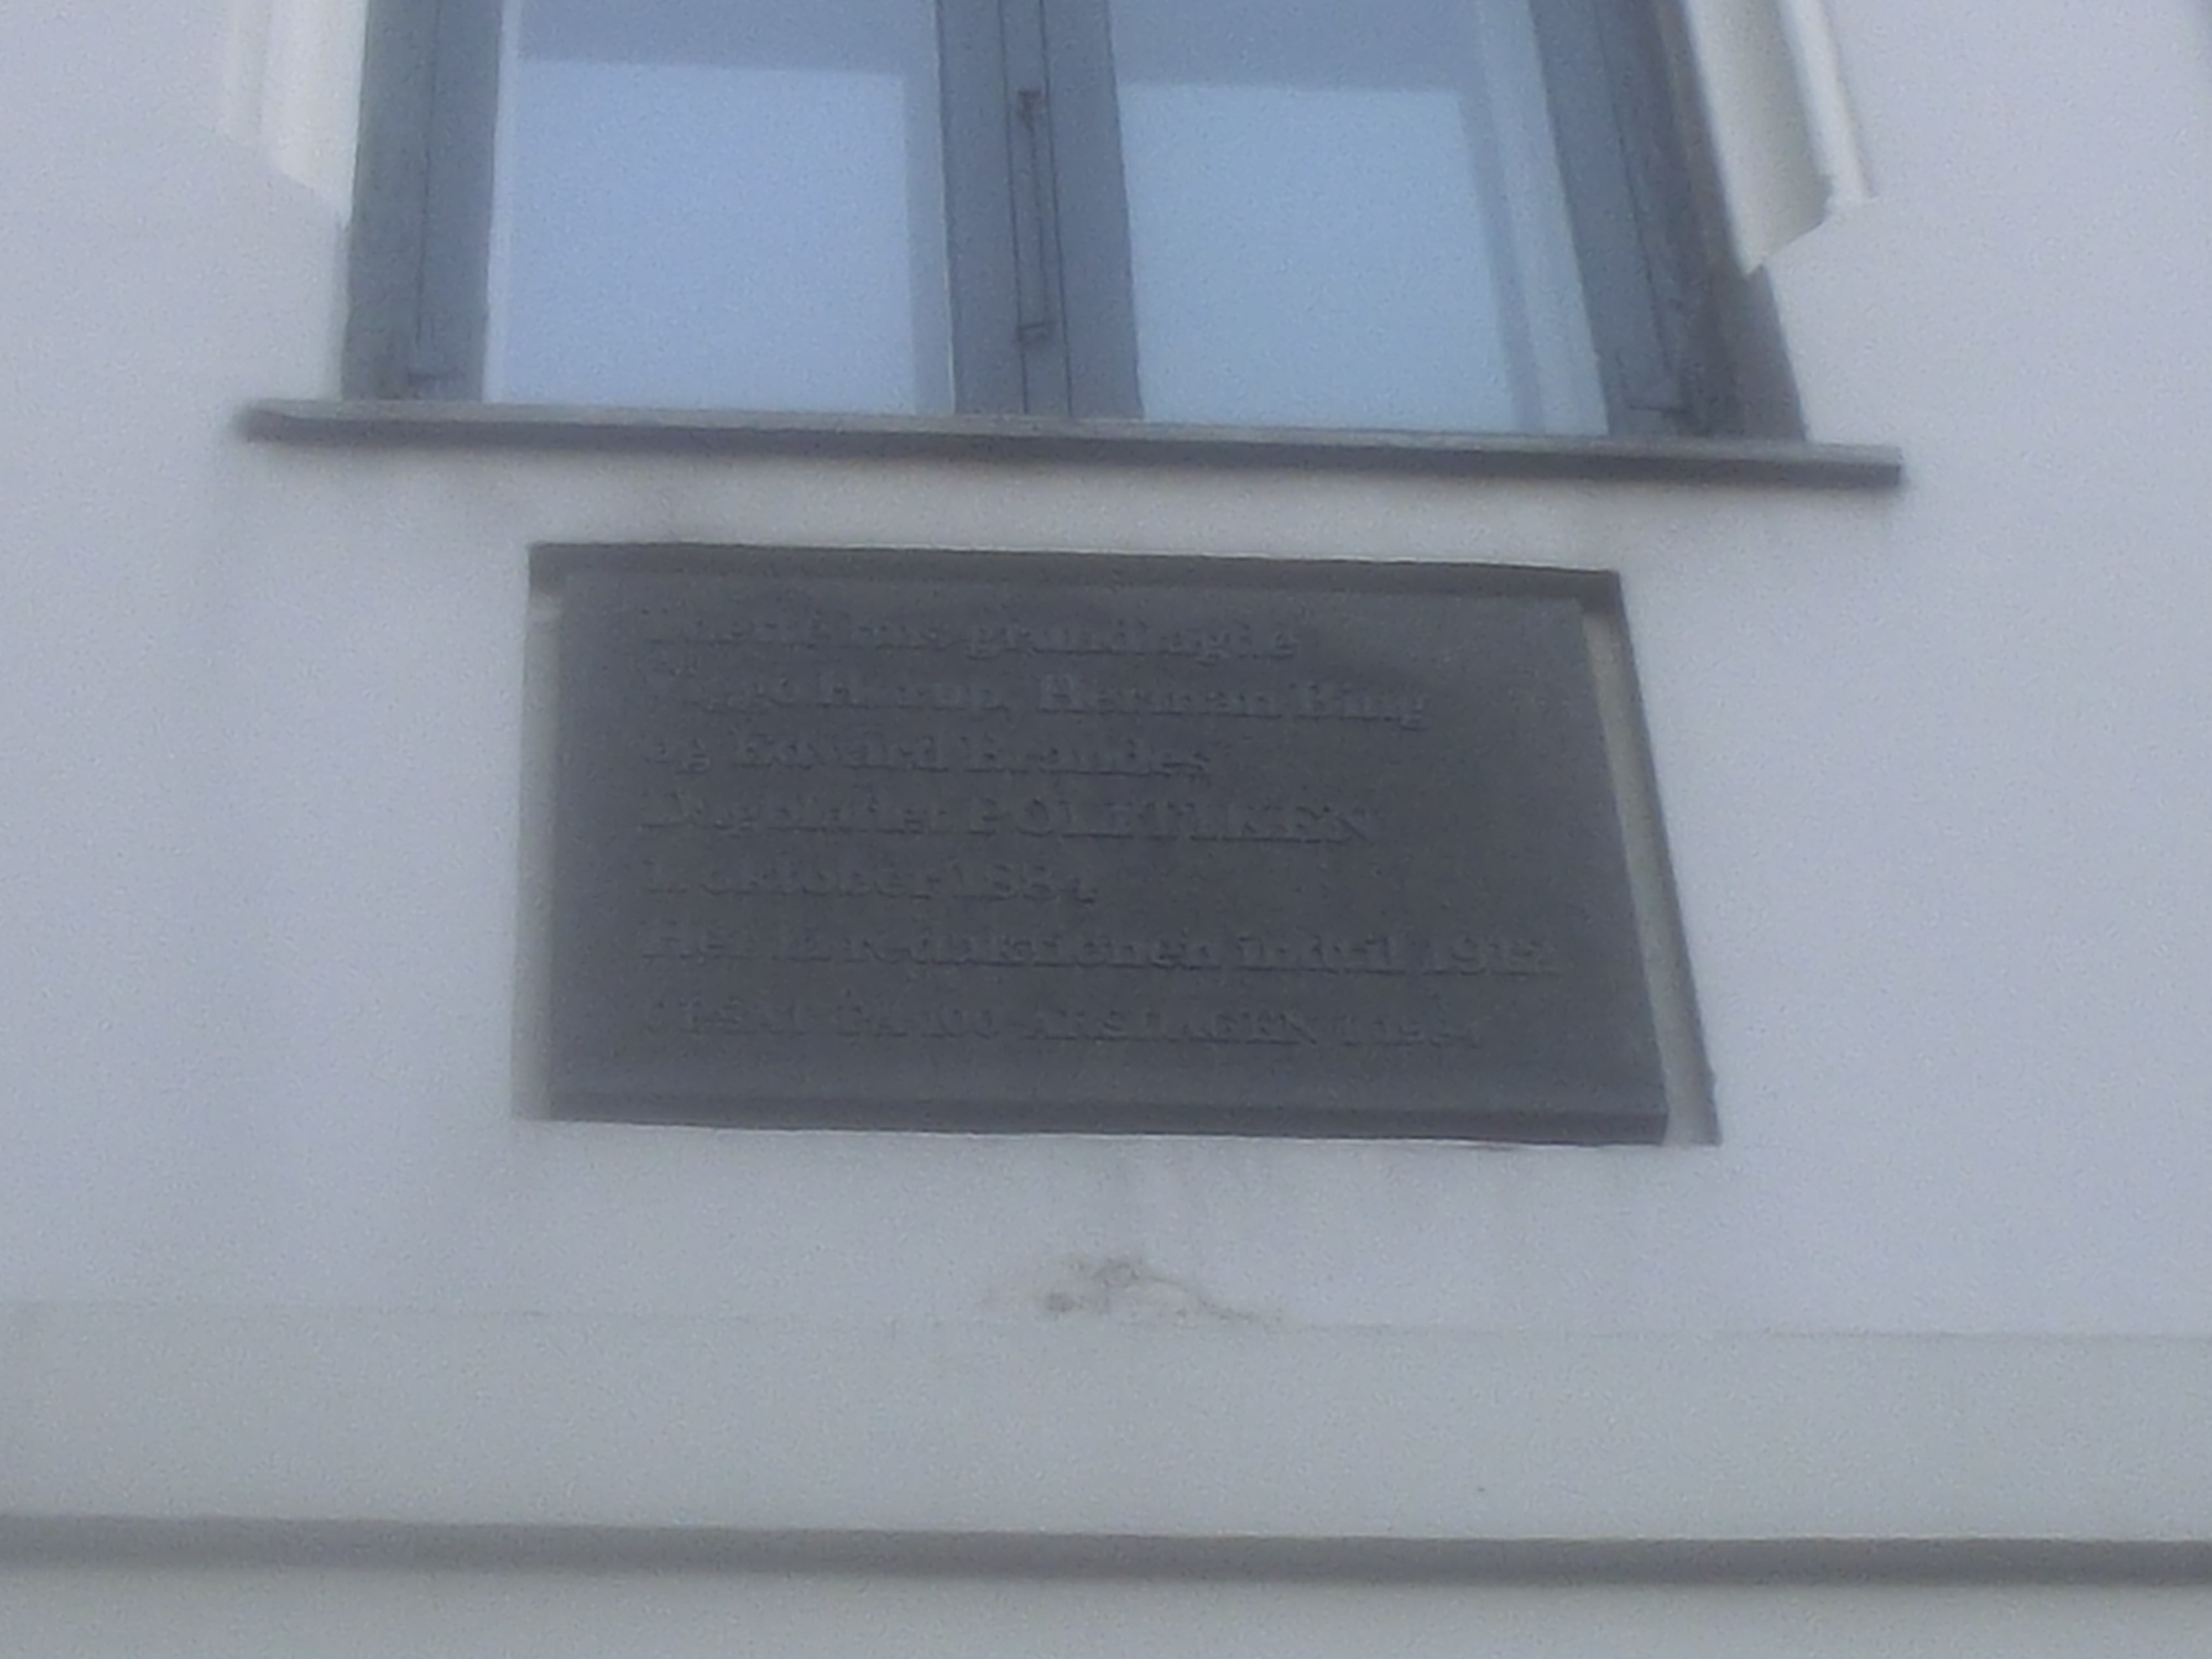
Here’s one in Central Copenhagen that I’ve never noticed before.
Founding of Politiken Commorative Plaque
It commemorates the founding of the Danish national newspaper Politiken October 1 1884, a very important day in Danish media history.
Now I want to add it to Wikimedia Commons and OpenStreetMap, and these are the steps involved.
Step 1: GeoLocation: Can be skipped if you took the picture with a modern cell phone that records camera location and heading (geotagged photos)
NOTE: This step can be skipped if you have a modern cell phone or camera with GPS that records the GeoLocation automatically (including compass heading).
The first step is to add the picture to Wikimedia Commons, I don’t have GPS in my camera, so I need to determine the location of the plaque, I use the excelent service GeoLocator, especially because it makes it easy to add the camera heading.
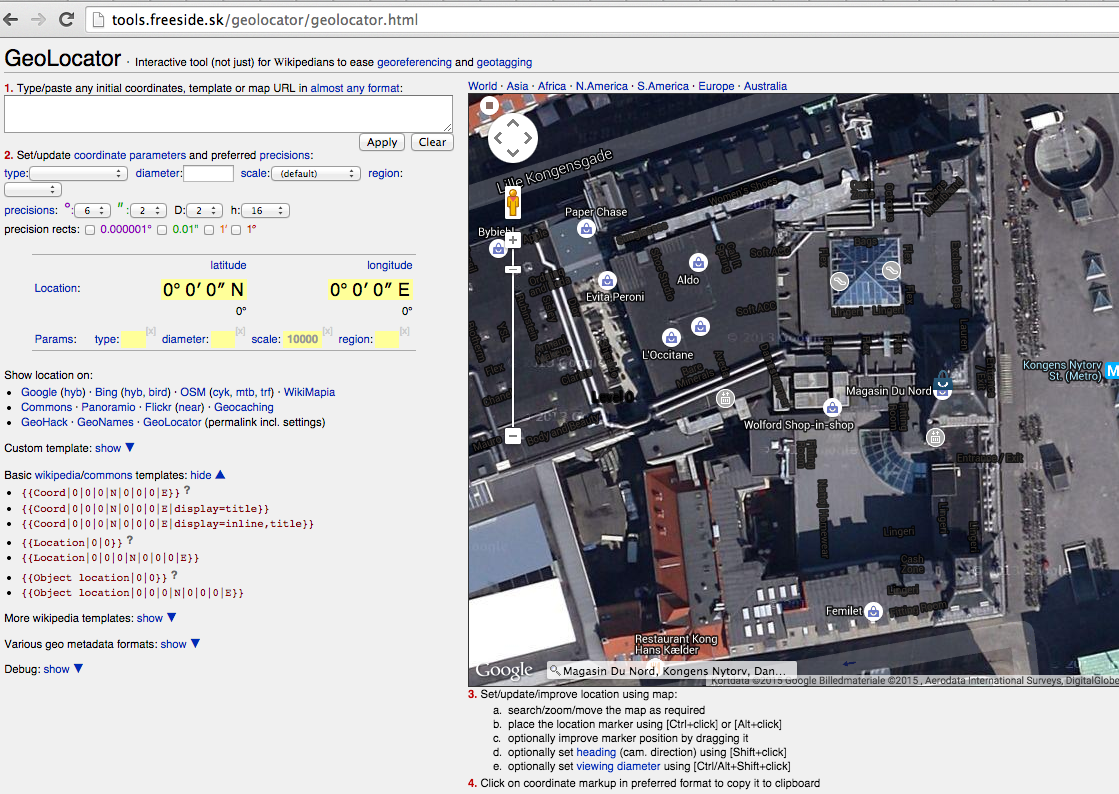
Since I knew that the plaque was located near the department store Magasin du Nord in Copenhagen, I did a search for it.
GeoLocator – Magasin du Nord
After I selected it, the map is shown.
GeoLocator – Magasin du Nord
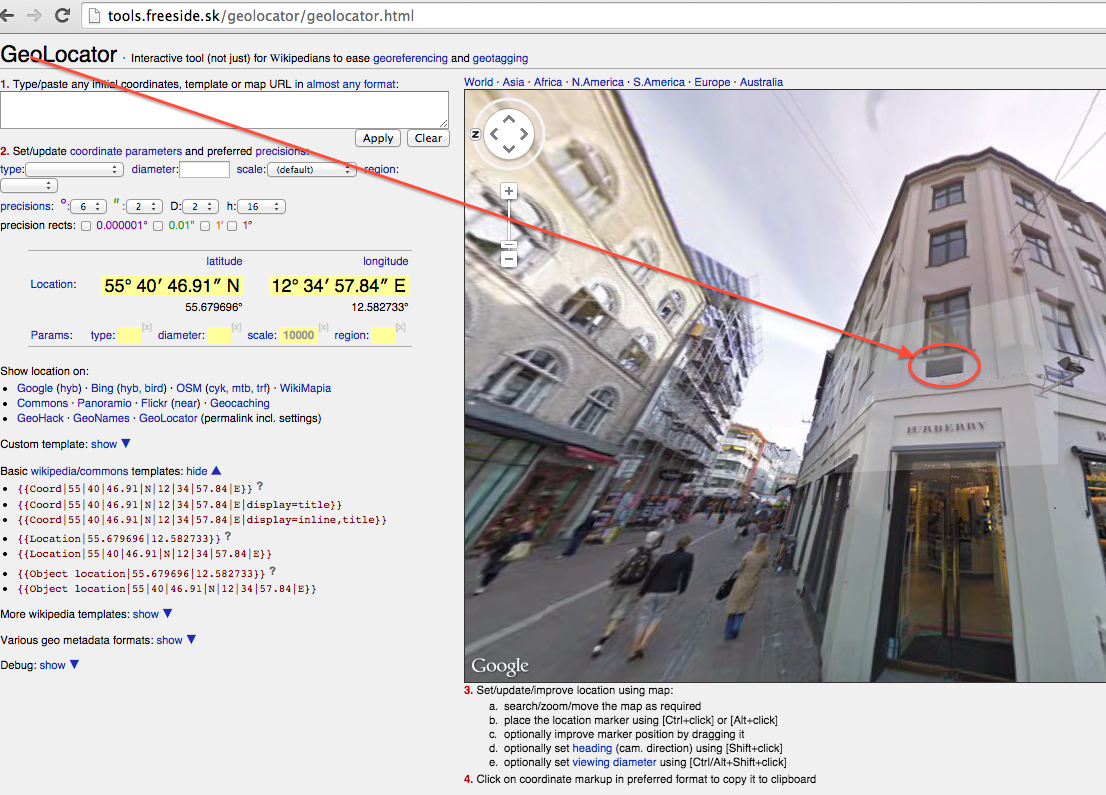
Find the precise location of the commemorative plaque, which is on the corner of Østergade and Kristen Bernikows Gade.
Alt+Clicked the location of the camera, which is the geo location that is used for Wikimedia Commons. GeoLocator – Founding of Politiken Commemorative Plaque
Notice the marker and that the latitude and longitude of the marker position is displayed.
Switch to Street View to confirm that we’re at the right location.
GeoLocator – Founding of Politiken Commemorative Plaque – Street View
Yes, that looks right.
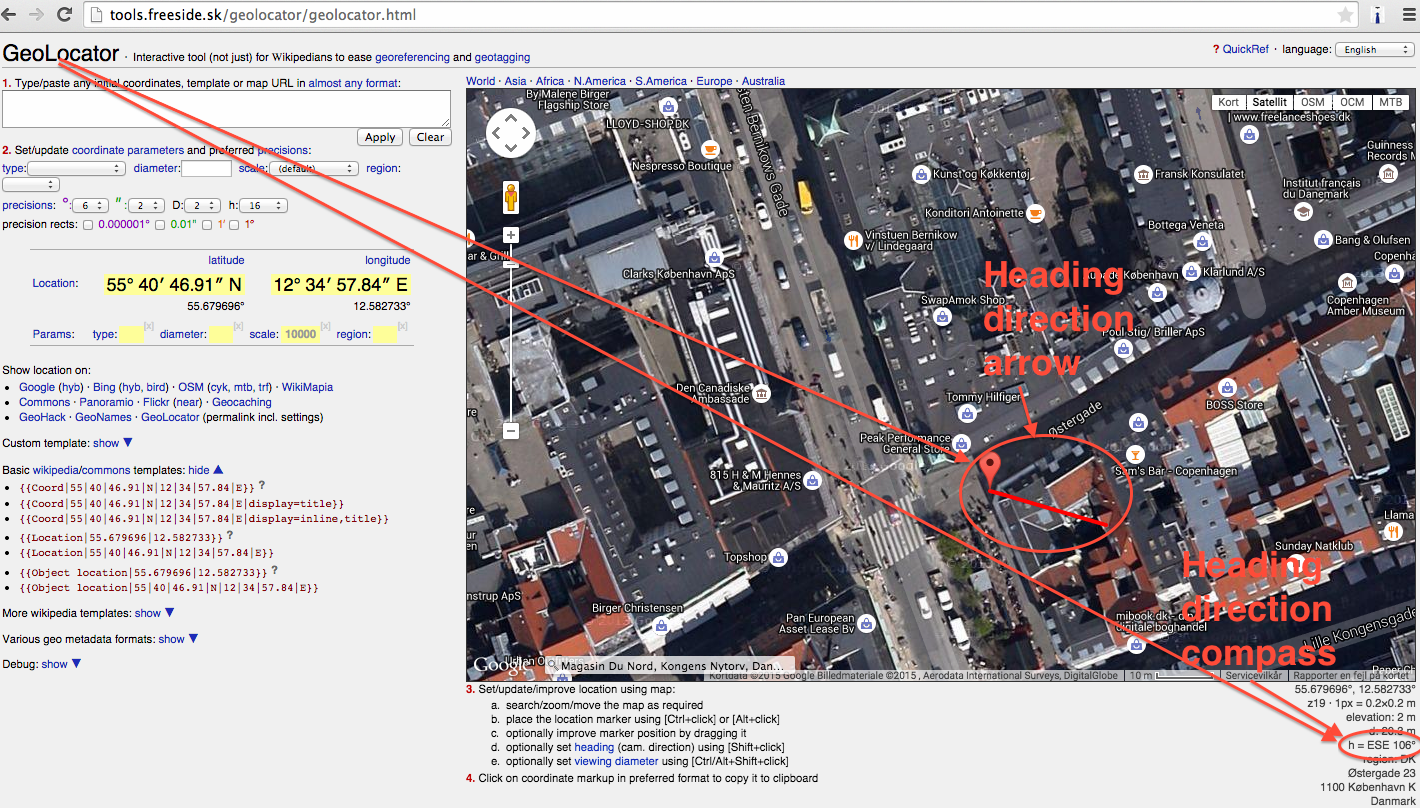
Now we need to get the compass heading of the camera, this is done by Shift+Clicking the map to draw a line indicating the camera heading.
GeoLocator – Founding of Politiken Commemorative Plaque – heading
Notice the arrow that indicates the direction, and the compass heading, next to the caption “h = ESE 106°”, meaning East-South-East 106 degrees.
That’s it, we now have the camera location:
latitude
55° 40? 46.91? N (55.679696°)
longitude
12° 34? 57.84?E (12.582733°)
heading
106°
Now we’re ready to upload the image to Wikimedia Commons.
Step 2: Upload image to Wikimedia Commons
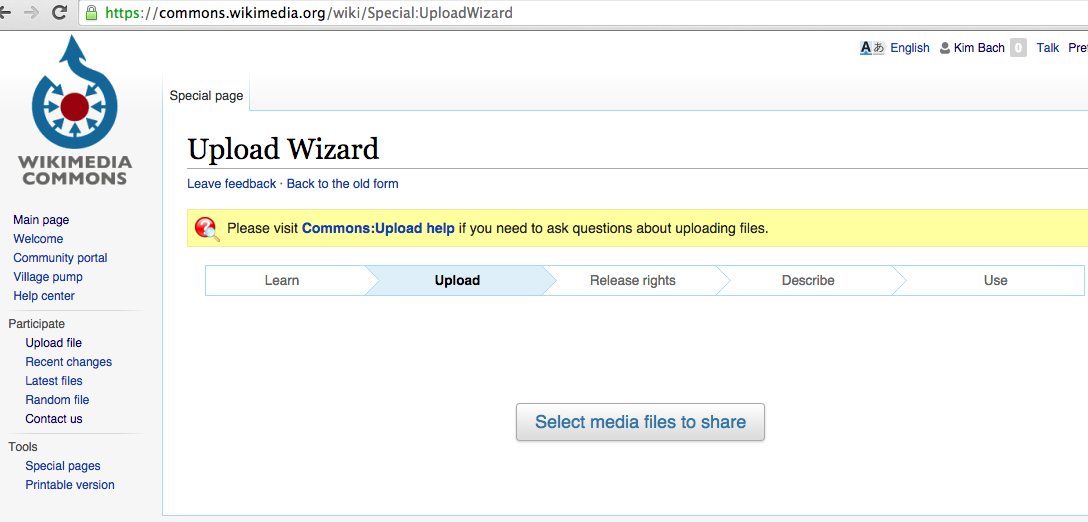
Go to the Wikimedia Commons UploadWizard (you’ll need a Wikimedia account, but don’t to worry, you’ll be prompted to create one.
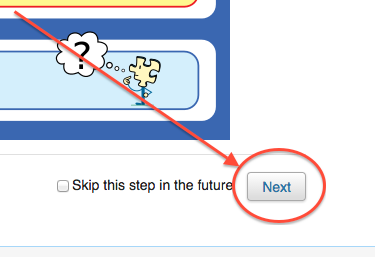
First the instructions are shown, I’ll skip those, it’s just to make sure that you understand the terms of sharing content on Wikimedia Commons, and make sure that you select the correct license.
Select the “Next” button on the bottom of the page, you can also select “Skip this step in the future” to dismiss the instructions page.
Wikimedia Commons – UploadWizard – Next
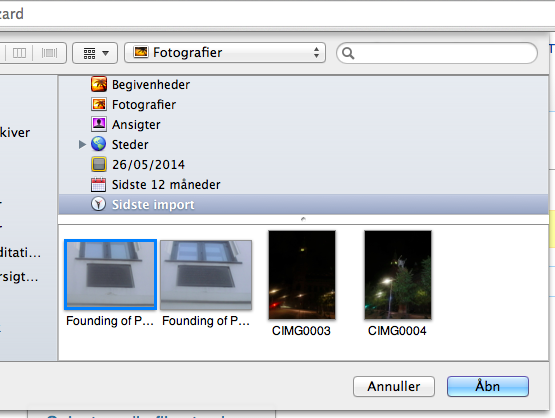
Select the media-files to upload.
Wikimedia Commons – UploadWizard – Select Media Files
Browse for the media files.
Wikimedia Commons – UploadWizard – Browse for Media Files
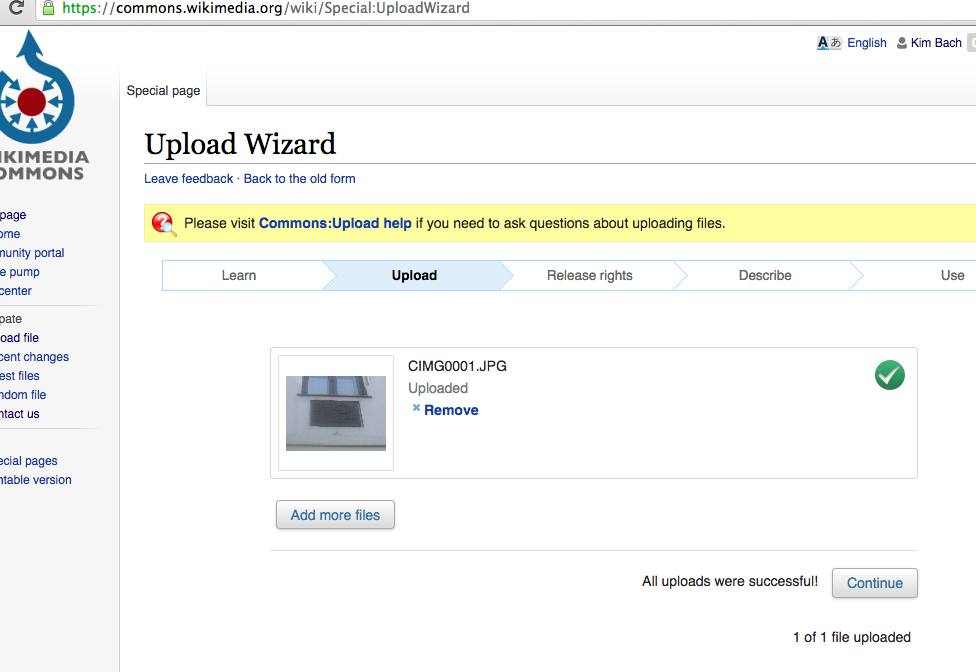
Select the file you want to upload.
Wikimedia Commons – UploadWizard – Files Uploaded
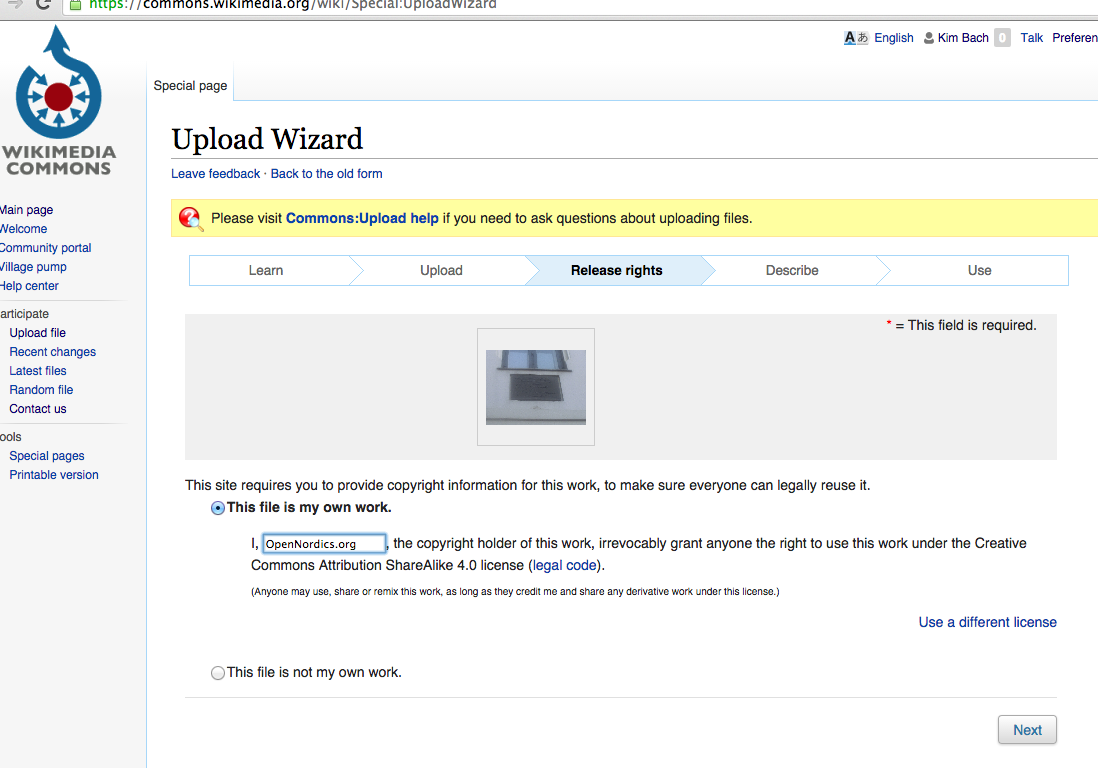
Press continue and select the release rights, usually “Own Work” if it’s pictures you’ve taken your self.
Wikimedia Commons – UploadWizard – Release Rights
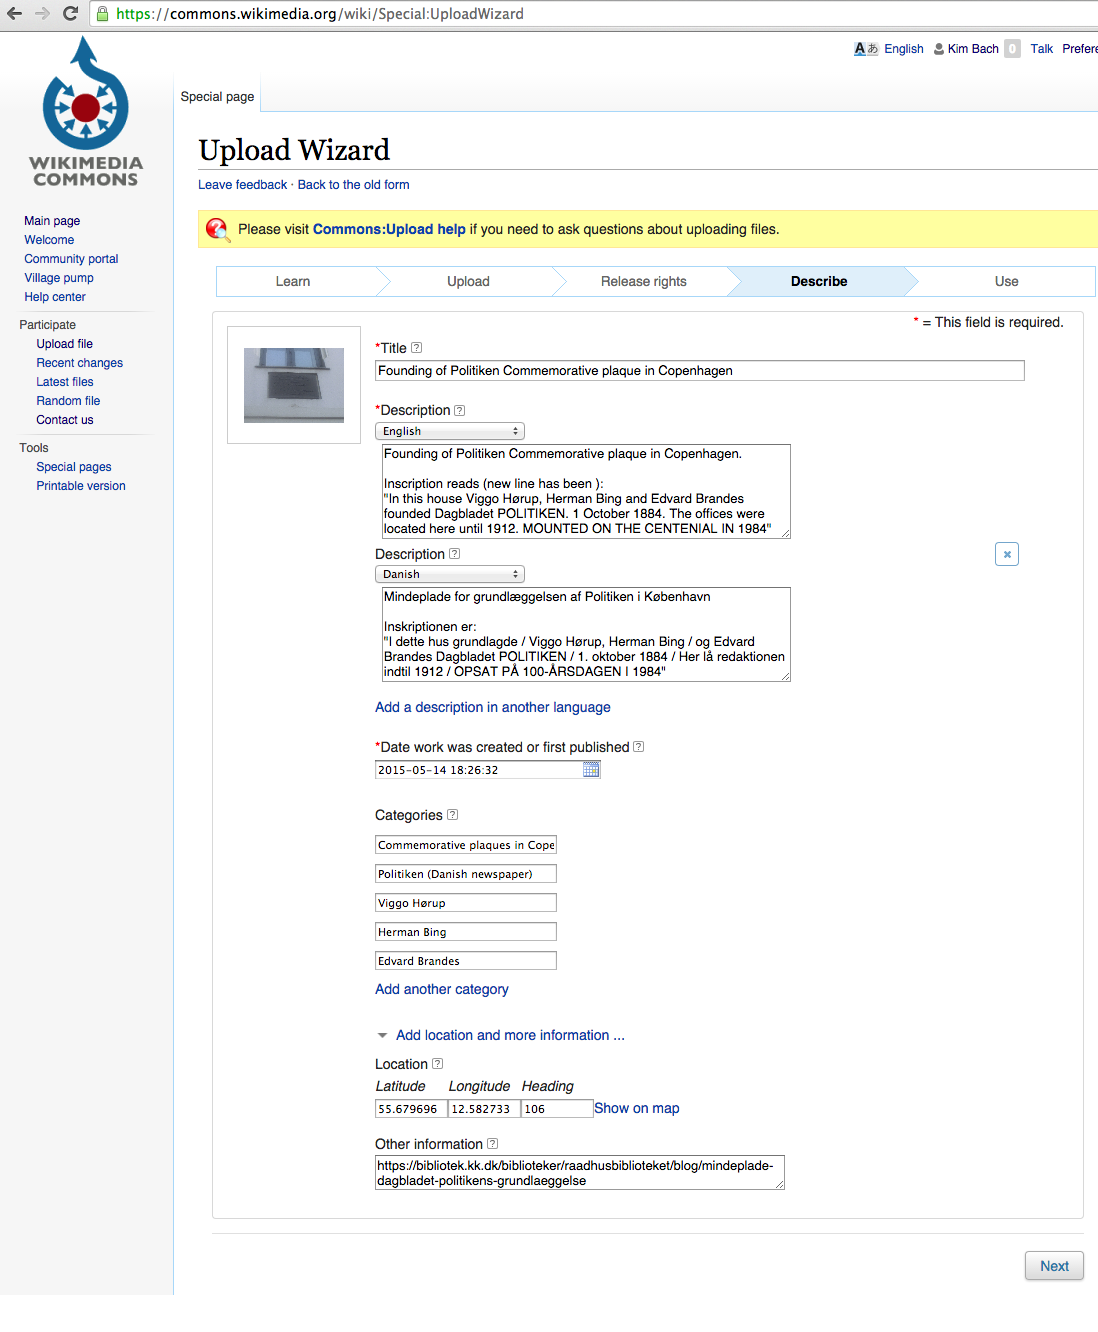
Now add some details, we’ve added a description in English, Danish, categories:
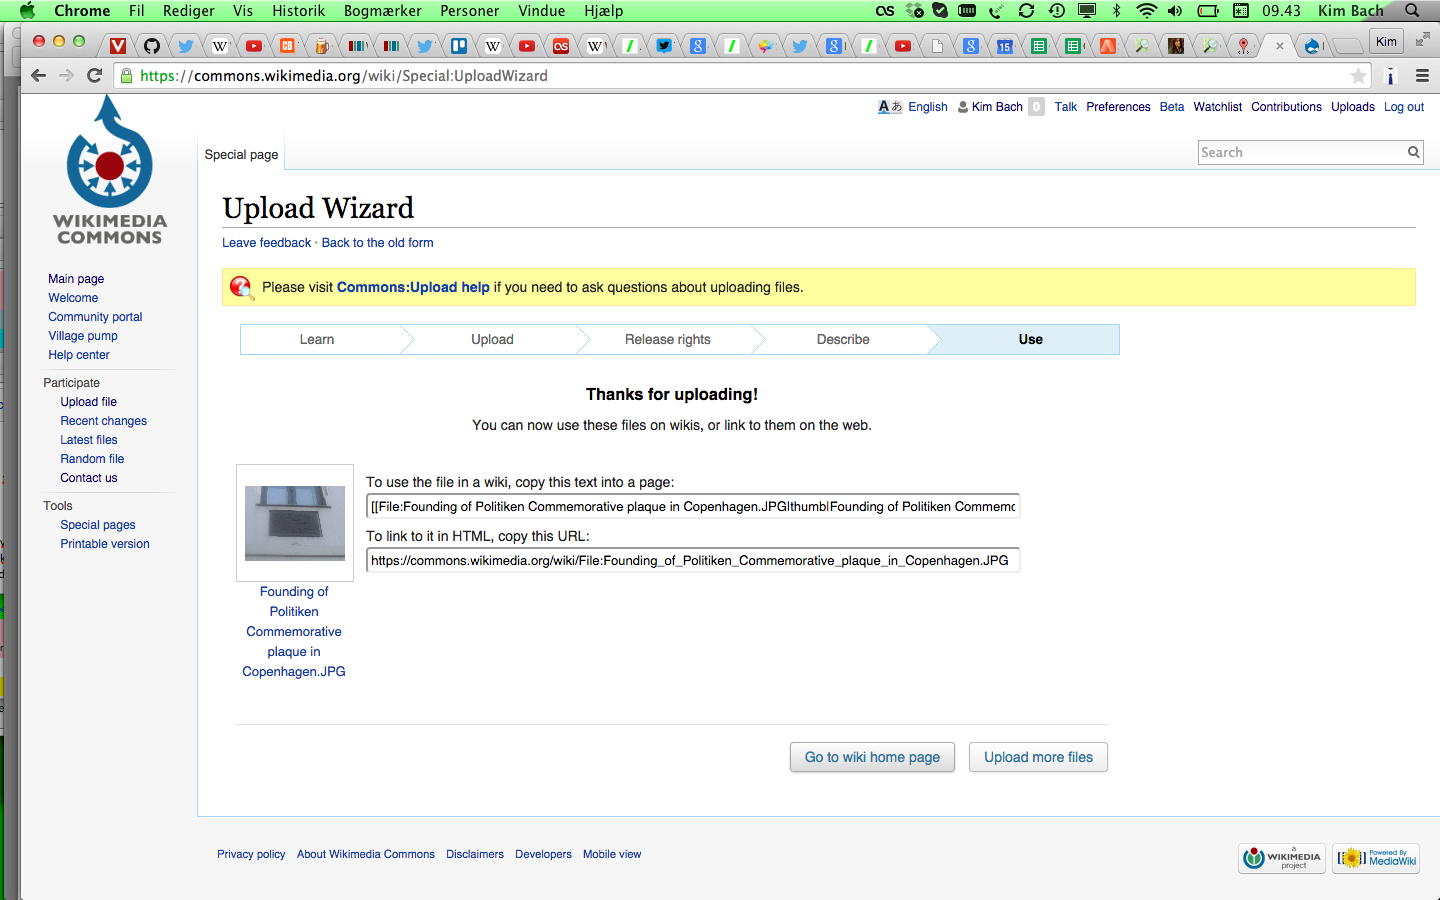
Select Next and you’re done, you picture has now been shared on Wikimedia Commons, and you can use it in other Wikimedia projects and on the web by copy/pasting the links show on the “Use” screen of the UploadWizard.
Wikimedia Commons – UploadWizard – Use
Step 3: Add OpenStreetMap (OSM) node
Finally we want to add a node to OpenStreetMap (OSM), you’ll need an OSM account, so create one if you don’t have one already Create new OpenStreetMap account.
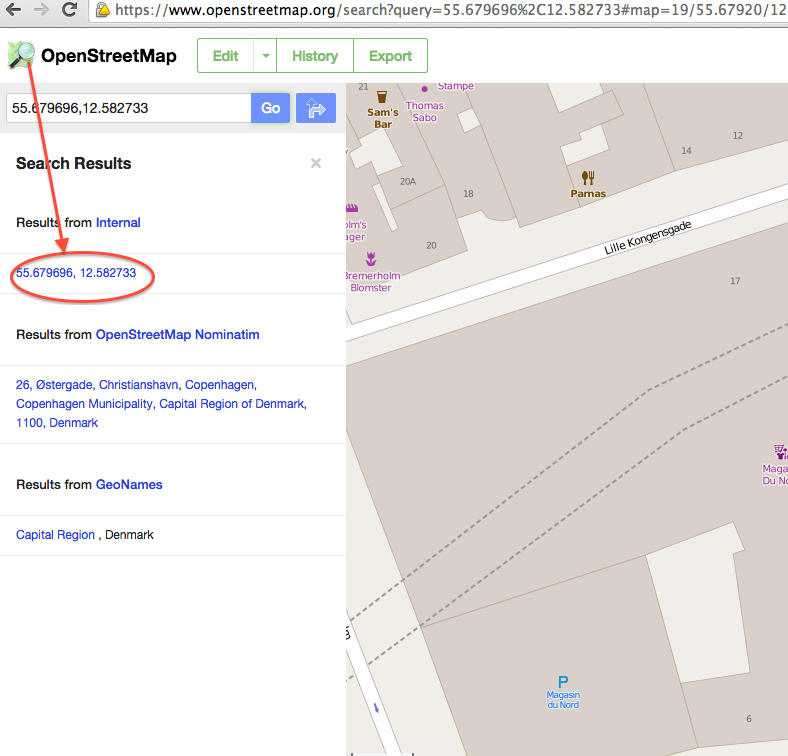
Since we’ve already established the location of the camera when we added the picture of the plaque to Wikimedia Commons, we do a search for that location on OSM.
latitude
55° 40? 46.91? N (55.679696°)
longitude
12° 34? 57.84?E (12.582733°)
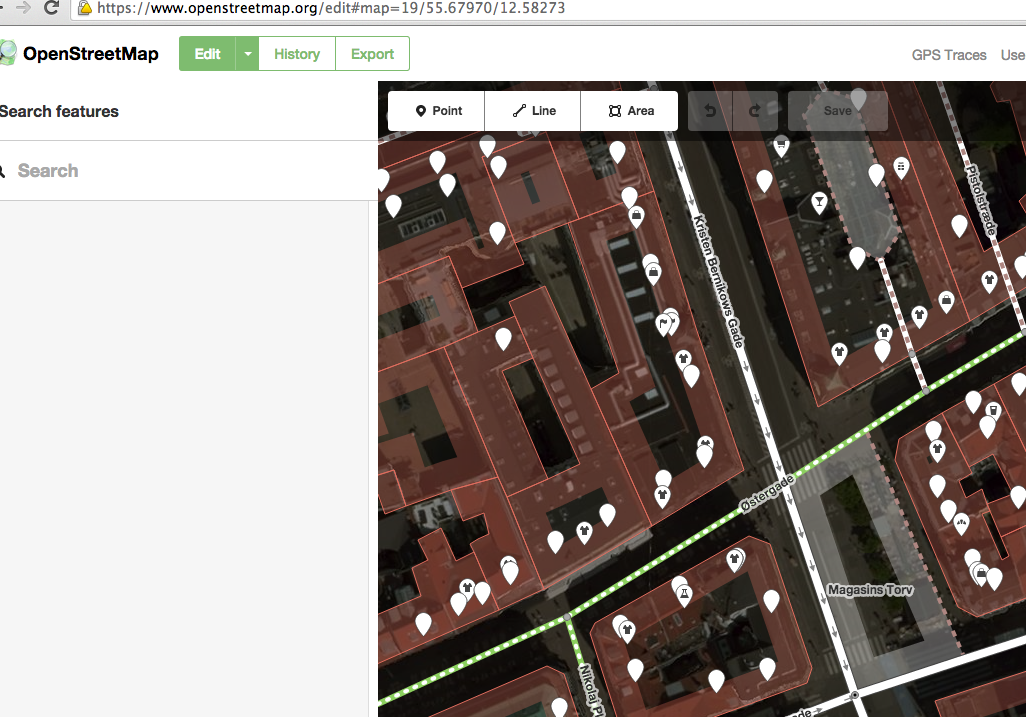
We’ve found the location, so select the link to the location
OpenStreetMap Search Results
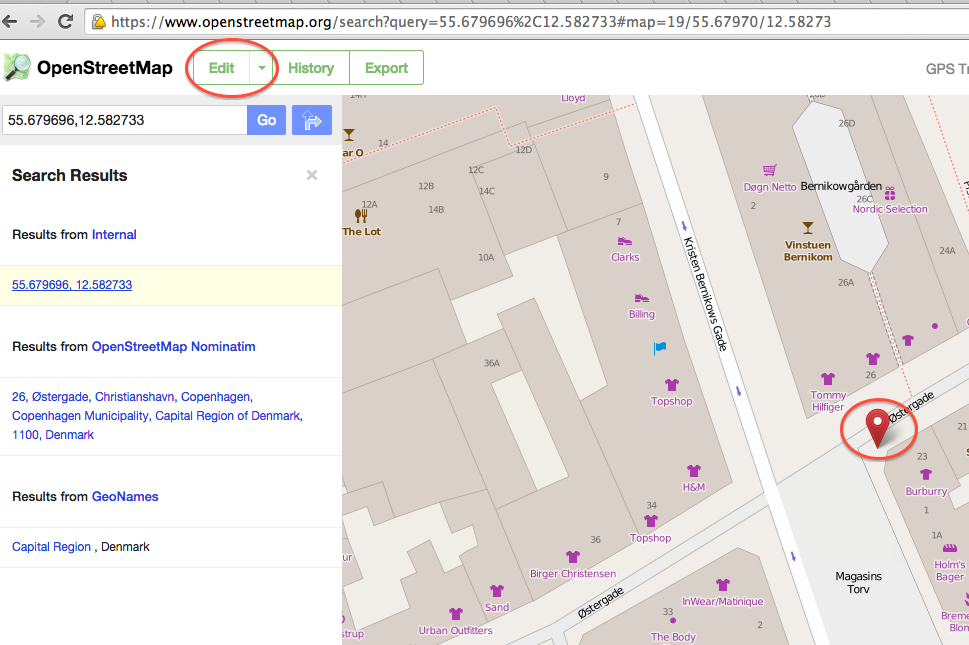
We now have a location marker and we can add the node by selecting the Edit button.
OpenStreetMap – Location selected
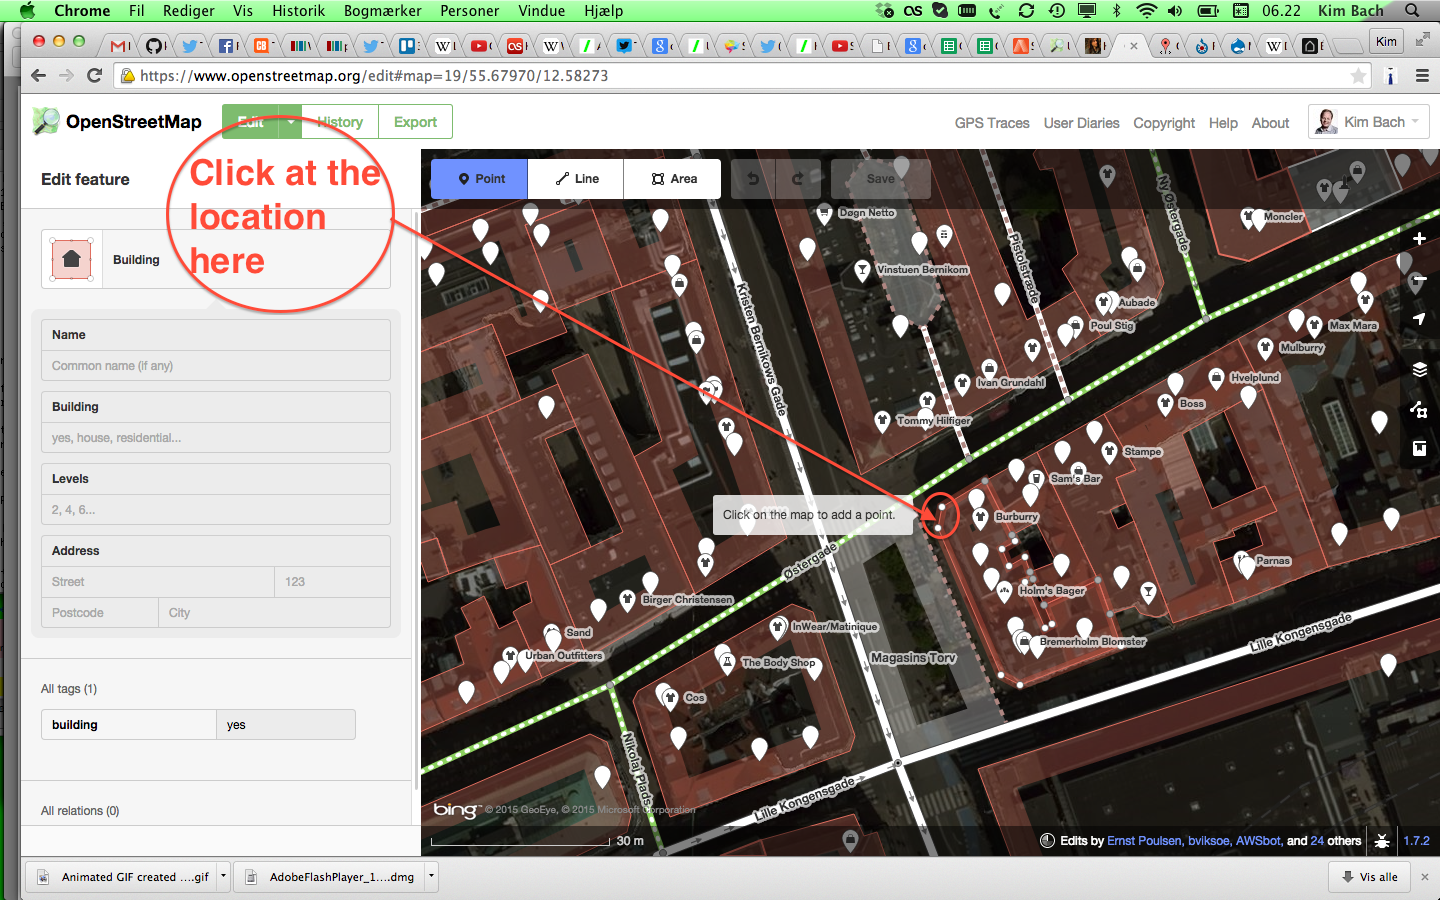
There are several different editors, but we’ll use the default editor, called ID, in this example. OpenStreetMap – ID Editor
Now we’ll the node by selecting the “Point” button, we’ll get a marker that we can move to the correct location, but notice that the location Wikimedia Commons wants is the location of the camera, but OpenStreetMap wants the physical location.
OpenStreetMap – ID Editor – Add point
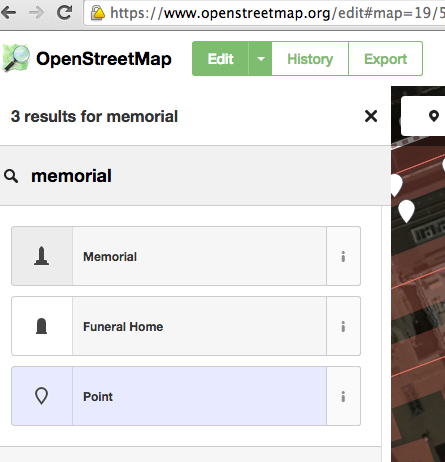
Now we need to add type of OSM node we want to add, it’s a memorial, so we’ll search for that.
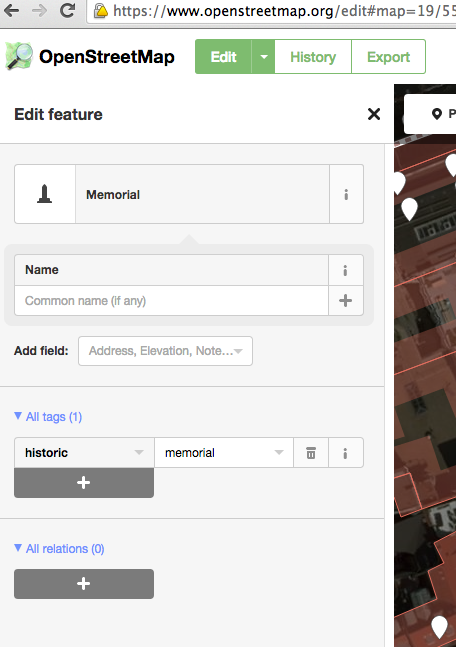
OpenStreetMap – ID Editor – Search for MemorialOpenStreetMap – Edit feature
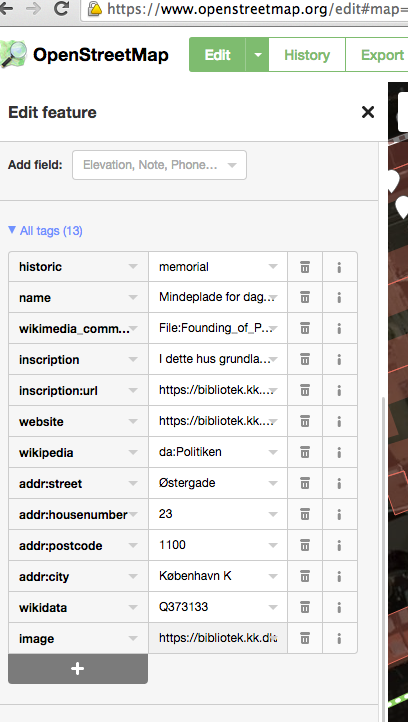
Now we’ll add some information. We’ll use the common name used by the website of the Copenhagen Library “Mindeplade for dagbladet Politikens grundlæggelse”
First use the “Add field” function to add commonly used fields in a nice UI, we’ve added “Name”, “Address”, “Website” and a link to the Danish “Wikipedia” page for Politiken.
This translates to “tags” in OSM terminology, and each node type has a number of different tags you can choose from, you can even invent your own, but you might consider suggesting them to the community.
For the node type historic=memorial you should consult the OSM Wiki page for the historical=memorial tag.
We’ll add these tags:
OpenStreetMap – Edit feature – All tags
Press “Save”, summarise the changes and press “Save” again.
OpenStreetMap – ID Editor – Save changes
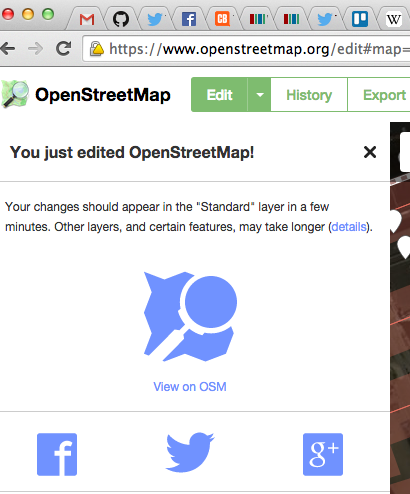
Congratulations: You just edited OpenStreetMap!
OpenStreetMap – ID Editor – You just edited OpenStreetMap!
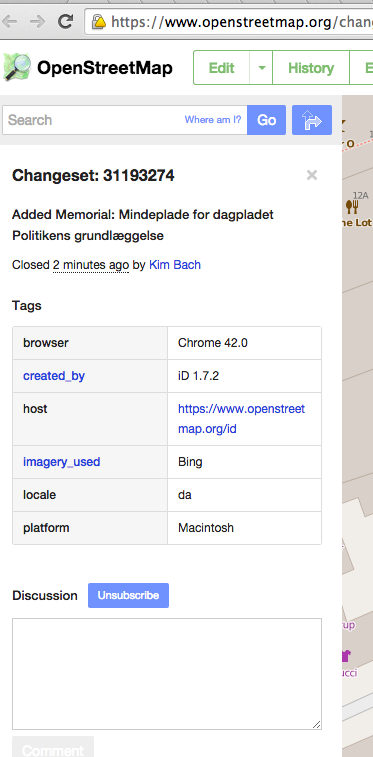
If you select “View on OSM”, you’re taken to the changeset
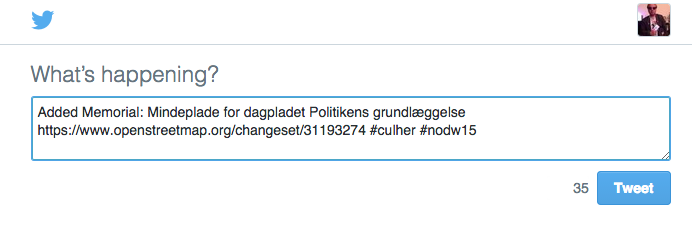
Notice that I’ve added the tags #culher for culTURALherITAGE and #nodw15 for Nordic Open Data Week 2015, since there’s a Open Data Cultural Heritage Challenge on during Nordic Open Data Week 2015
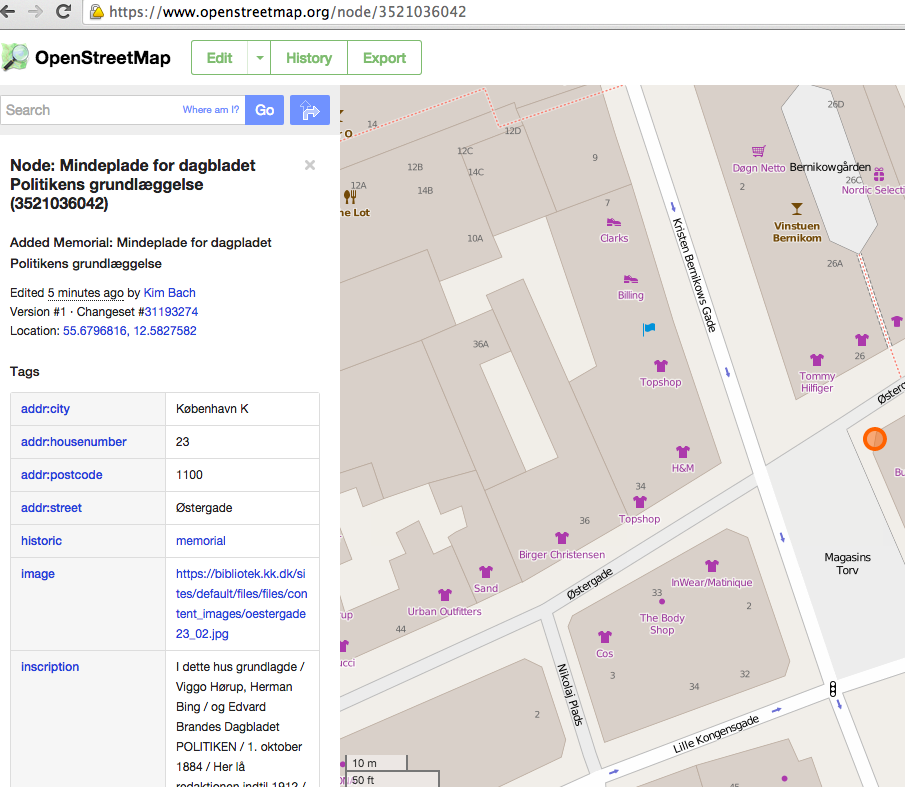
You now have the skills to share cultural heritage on the Wikimedia Commons and OpenStreetMap. Notice that I’ve been very thorough, you can choose to cut a few corners.
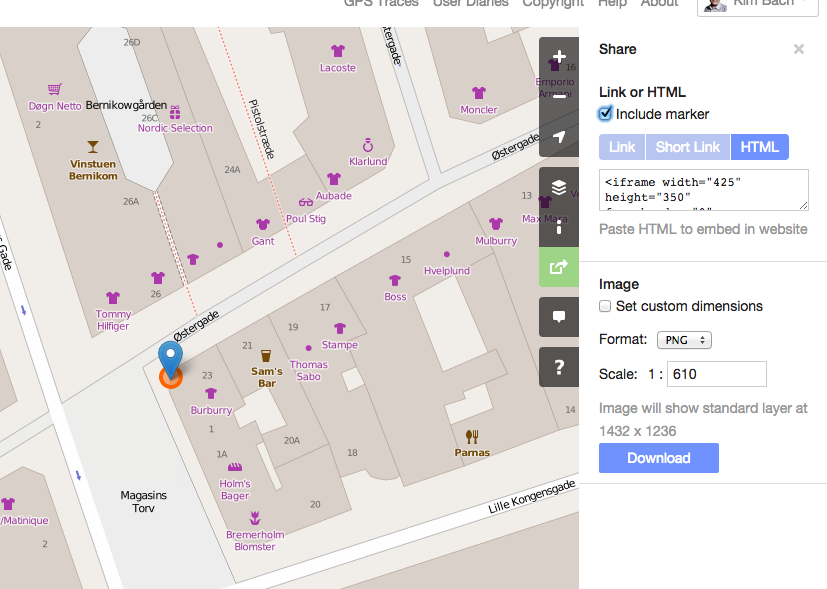
Finally press the share button, add a “marker” and select HTML format and copy/paste the code it to website.